SlackのEnterprise GridでAdmin APIを使えるようにするまで
この記事は?
- Slack Enterprise Gridプランで使えるAdmin系のAPIで利用するためのTokenを入手するまでの手順。
- 「色々試してうまくいった」という感じなのでお作法やら何やらが間違っている可能性あり。

参考にさせていただいたURL
この手順書の最終ゴール
作成されたTokenを使って admin.teams.lis のテスターページから、管理化にあるSlackワークスペースの一覧が表示できるようになること。
前提条件
- 作業環境はMacを想定しています。 ※Windowsの方は適宜、読み替えてください。
- Node.JSが動く環境を想定しています。
Node.JS インストールとうでググれば環境構築手順は多数出てくるので、この資料では環境構築については省きます。
手順概要
- [Slack] 適当なSlack Appを作る。
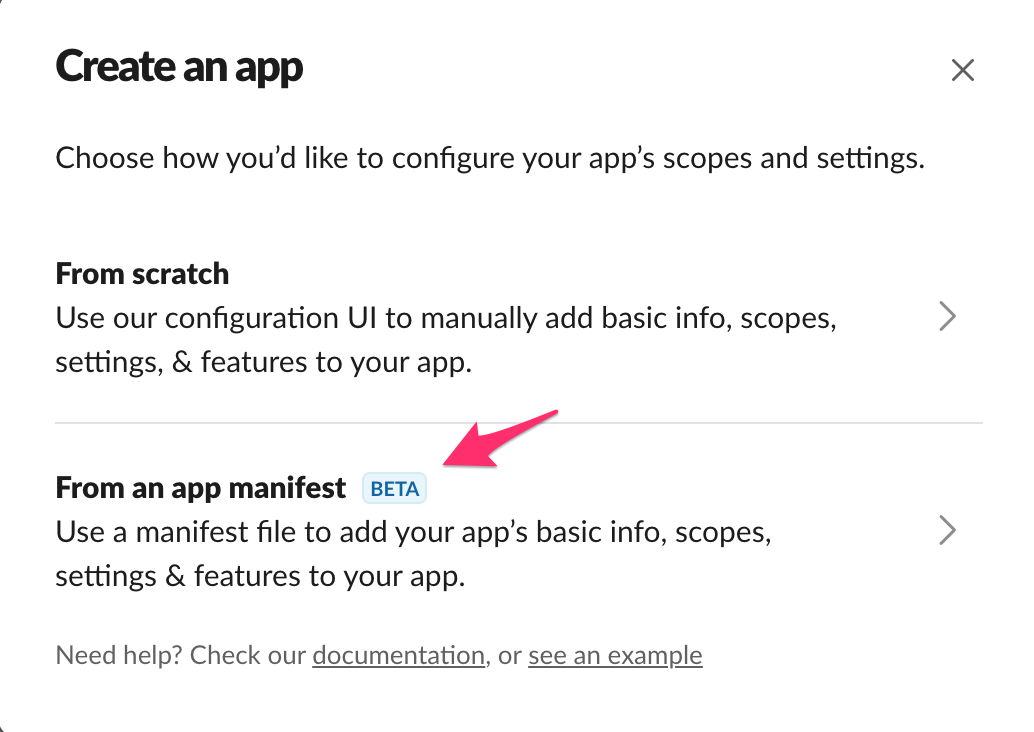
- アプリ作成時の初期画面で、
From an app manifestを選択して、下記JSONを指定してください。 - 権限として、
"admin.teams:read"を利用することにしているので権限を変えたければ、アプリ作成後に OAuth & Permissions のメニューから必要な権限を選択してください。 - インストール先のSlackワークスペースはどこでもいいです。
{
    "display_information": {
        "name": "admin_teams_read"
    },
    "oauth_config": {
        "redirect_urls": [
            "https://localhost:3000"
        ],
        "scopes": {
            "user": [
                "admin.teams:read"
            ]
        }
    },
    "settings": {
        "org_deploy_enabled": false,
        "socket_mode_enabled": false,
        "token_rotation_enabled": false
    }
}
- アプリ作成時の初期画面で、
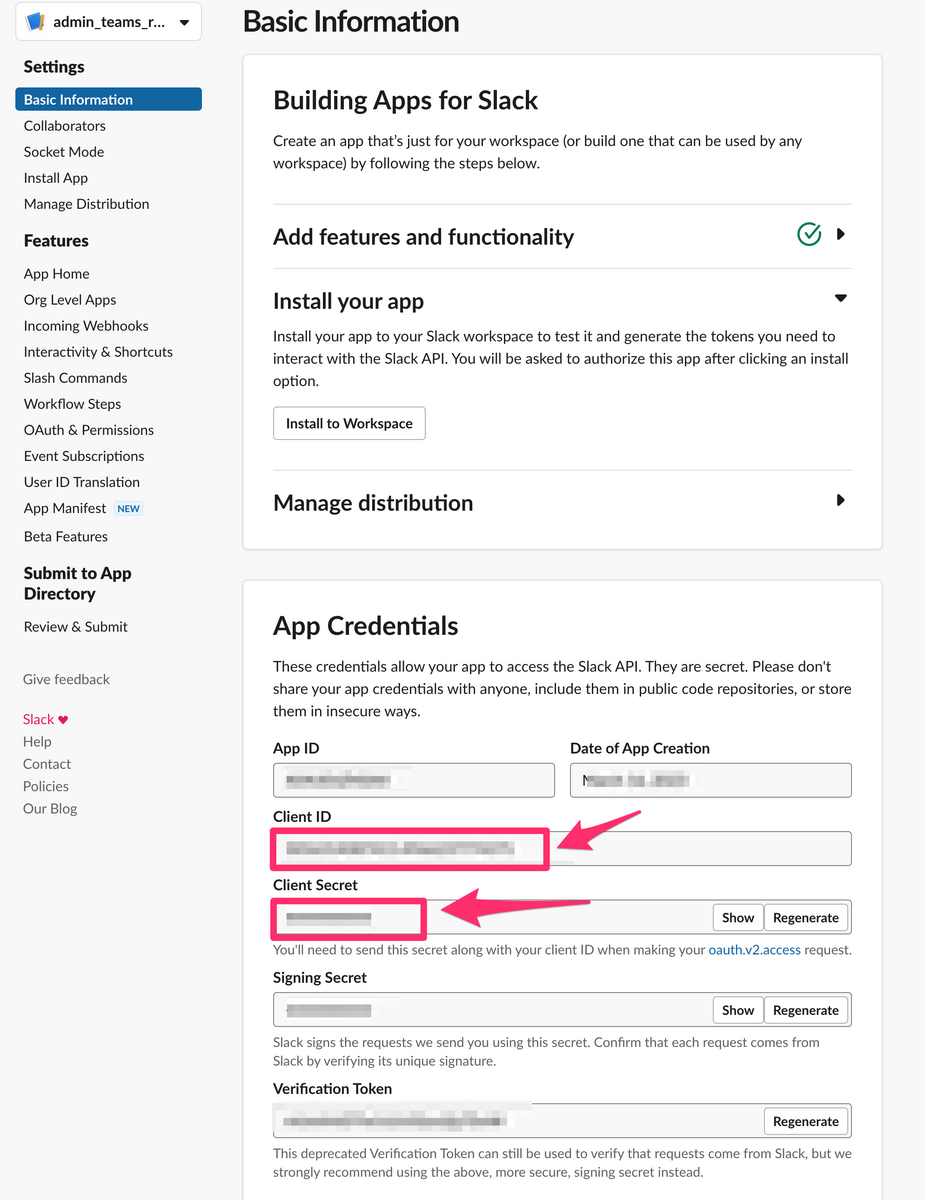
- 作成された画面のApp Credentialsという項目に、Client IDとClient Secretの項目があるので、それぞれメモしておく。(※あとで使う)
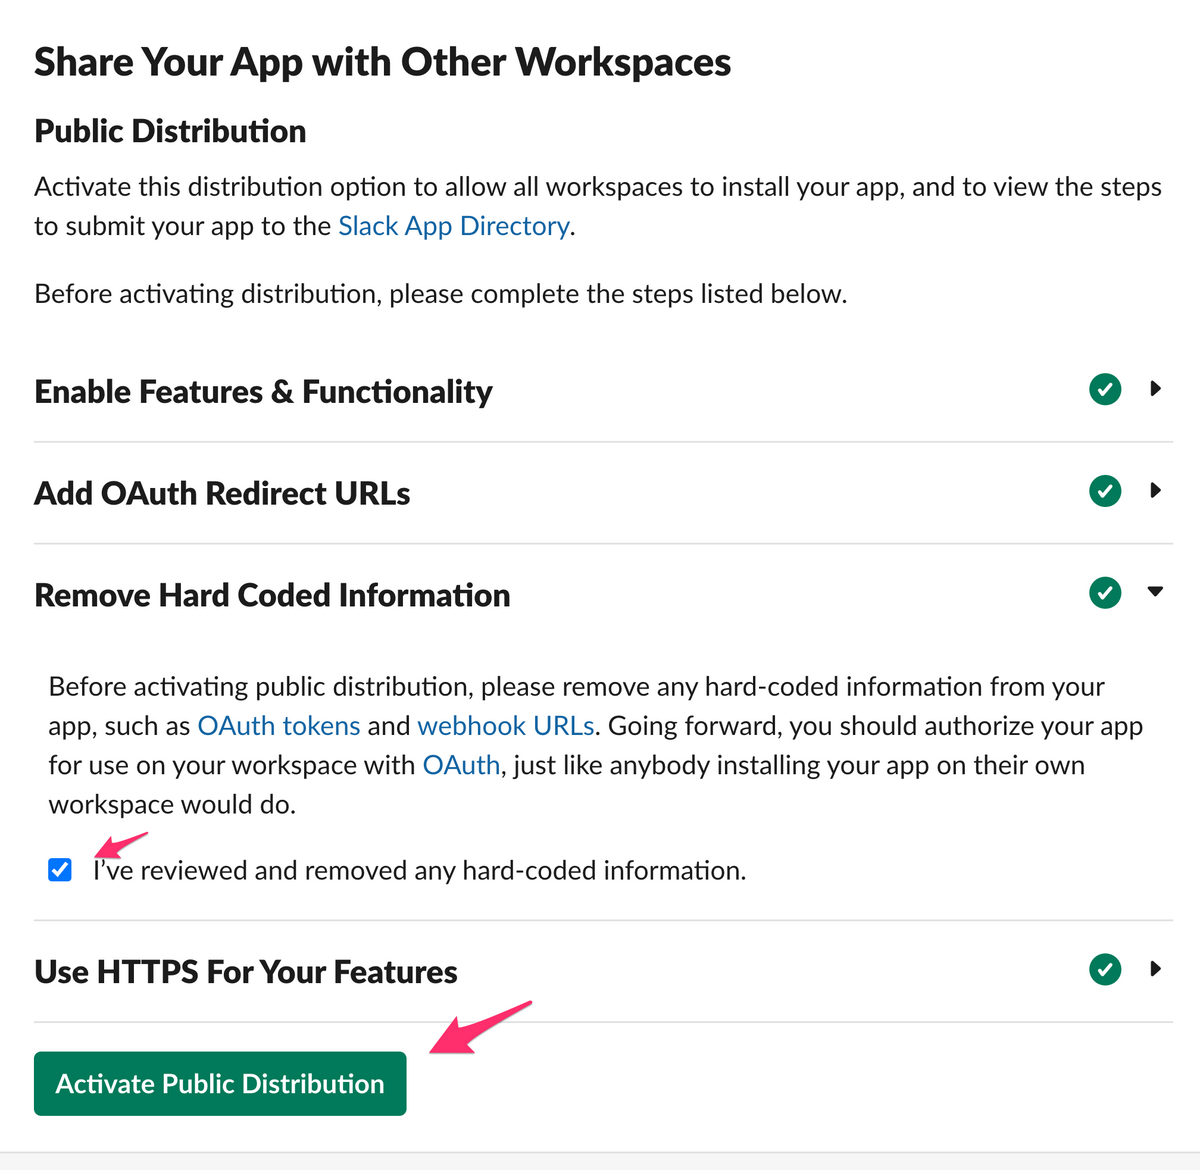
- [Slack] Manage Distribution メニューを選択して、Remove Hard Coded Information の欄にチェックを入れて、 Activate Public Distribution を選択する。
- [Slack] 同画面の上部に Shareble URL という項目があるので、それに記載してあるURLをメモしておく。(※あとで使う)
- [PC] OAuth2サーバ用の自己証明書を作成する。
- すぐに利用しなくなる証明書なので
/tmp配下に作成しておく。 mkdir -p /tmp/slack-oauth2.0-client cd /tmp/slack-oauth2.0-client openssl genrsa 2048 > server.key #※証明書について色々聞かれるが「Locality Name」だけ「JP」と答えて、あとは未入力。 openssl req -new -key server.key > server.csr # You are about to be asked to enter information that will be incorporated # into your certificate request. # What you are about to enter is what is called a Distinguished Name or a DN. # There are quite a few fields but you can leave some blank # For some fields there will be a default value, # If you enter '.', the field will be left blank. # ----- # Country Name (2 letter code) []:JP <-ここだけJPにする # State or Province Name (full name) []: # Locality Name (eg, city) []: # Organization Name (eg, company) []: # Organizational Unit Name (eg, section) []: # Common Name (eg, fully qualified host name) []: # Email Address []: # # Please enter the following 'extra' attributes # to be sent with your certificate request # A challenge password []: openssl x509 -days 3650 -req -sha256 -signkey server.key < server.csr > server.crt
- すぐに利用しなくなる証明書なので
- [PC]作業ディレクトリを作成し、そこにOAuth2サーバー用のスクリプトを配置する。
- 配置するのは下記のapp.jsとpackage.jsonです。
- app.js
const request = require('request');
const express = require('express');
const app = express();
const fs = require("fs");

const slack_client_id = process.env.SLACK_CLIENT_ID;
const slack_client_secret = process.env.SLACK_CLIENT_SECRET;

app.get('/', (req, res) => {
    // 認可コードの取得
    const code = req.query["code"];

    // 認可コードを使って、アクセストークンをリクエストする
    request({
        url: "https://slack.com/api/oauth.v2.access",
        method: "POST",
        form: {
            client_id: slack_client_id,
            client_secret: slack_client_secret,
            code: code,
            redirect_uri: "https://localhost:3000/"
        }
    }, (error, response, body) => {
        // レスポンスからアクセストークンを取得する
        const param = JSON.parse(body);
        console.log(param);
        const access_token = param['access_token']; // アクセストークン
    })
})

// http サーバ
var http = require("http").Server(app);         // http サーバを立てる
http.listen(80);                                // 80番ポートで待つ

var opt = {                                     // SSL 認証のパラメータ
  key:  fs.readFileSync("/tmp/slack-oauth2.0-client/server.key"),          // 秘密鍵
  cert: fs.readFileSync("/tmp/slack-oauth2.0-client/server.crt"),          // 証明書
  //passphrase: "password",                     // パスワードを設定した場合
};
var https = require("https").Server(opt, app);  // https サーバを立てる

https.listen(3000, () =>{
        console.log('HTTP Server(3000) is running.');
});
- package.json
{
  "dependencies": {
    "cors": "^2.8.5",
    "express": "^4.17.0",
    "request": "^2.88.0"
  }
}
- app.js
- 配置するのは下記のapp.jsとpackage.jsonです。
- [PC]
npm installコマンドで初期化しておく。 - [PC]手順2でメモしておいた Client IDとClient Secretを下記のように一時的に環境変数に入れておく。
export SLACK_CLIENT_ID="メモしたClient ID"
export SLACK_CLIENT_SECRET="メモしたClient Secret"
node app.jsでOAuth2サーバを起動して待ち受けておく。- [PC] 手順4でメモしたShareble URLの末尾に
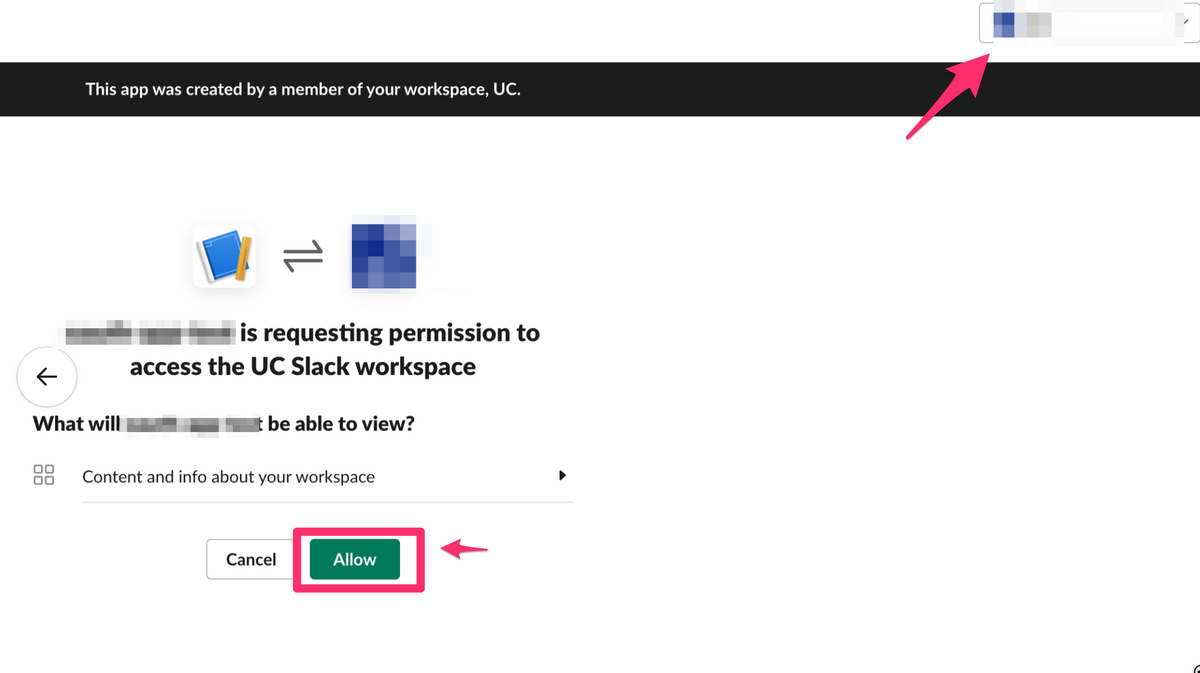
&redirect_uri=https://localhost:3000/とつけたURLを適当なブラウザで開く。 - [PC] Slackの認証画面が表示され、画面右上の方にSlackワークスペースを選択する画面が表示されるので、オーガナイゼーションのSlackワークスペース(一番親のワークスペース)を選択して、 Allow ボタンを選択。
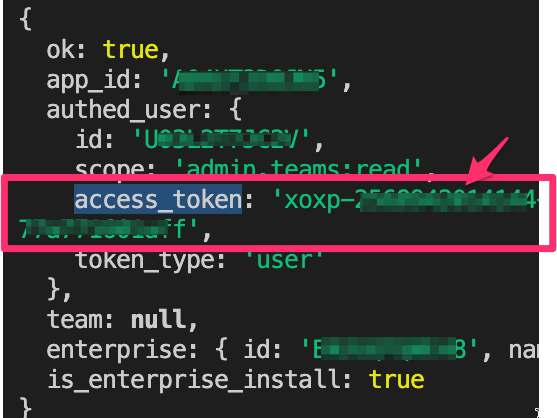
- [PC]手順9で立ち上げていたOAuth2サーバのコンソールに access_token という値があるのでそれが今回の目的のSlack Tokenなので、それをメモしておく。
- 手順11でアクセスしたSlackの画面はグルグルとロード画面のままになっているが☓ボタンで閉じてOK。
- 以上
試してみる
- admin.teams.list のテスター画面にて取得したTokenを指定してみる。
- 意図した結果になればOK。